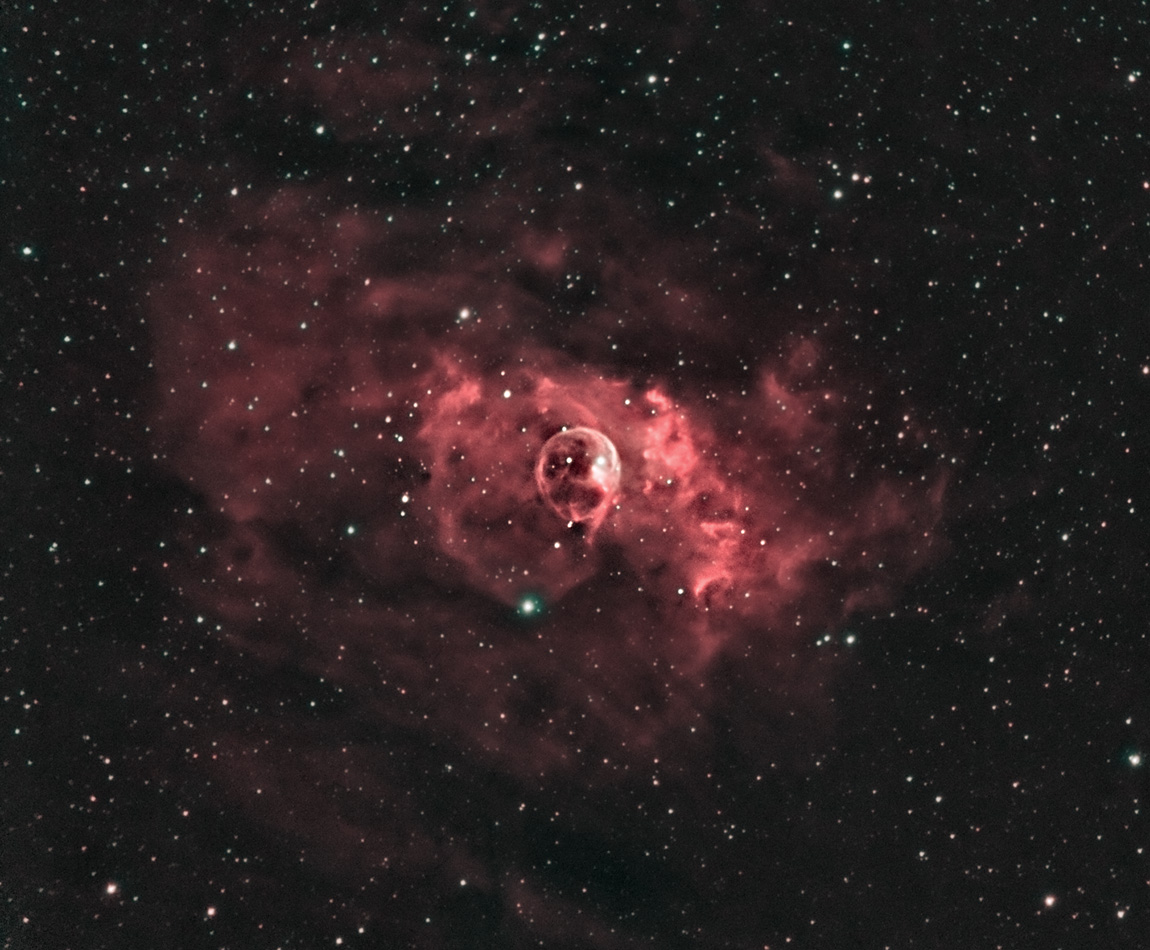
We have now arrived at the final stage of processing the images. Certain treatments will make it possible to resolve the image in order to reveal all the nuances of the object as much in the clearest, middle and darker luminosities. Other treatments will correct image imperfections such as coma problems, vignetting, sharpness due to imprecise focusing, etc.
The goal of image processing, which will be presented in this section, is to best resolve the image while maintaining its integrity. We can correct imperfections due to optics, shooting under a polluted sky, remaining background noise and others. But we must keep as a principle not to change the real aspect of the image.
Five applications will be used for the treatments:
|
The basis of processing is done with Photoshop. I added treatments with the software Pixinsight which I consider very efficient, considering that the latter is specialized for the treatment of astronomical images. The processes presented will be carried out according to a suggested sequence of treatments. So I can switch from one software to another. It should be noted that not all the processing operations must be applied in full to a given image. However, some treatments should always be used. I will mention it for each treatment by indicating "Essential" or "Optional". For users of Pixinsight, which is a complex software to use, I will present the parameters that I recommend for each treatment. So you should be familiar with this software.
1- Withdrawal of the gradient (Optional)
If you notice that there is a gradient or vignetting in the image due to the optics used or to light pollution, perform the following treatments with Photoshop :
Balance and color balance of the image using levels or the Black and White Point method
We start with this treatment to balance the image. Of course, do not make the black point in the gradient, but rather in the darkest region of the sky background. See Treatment 2 below.
Gradientxterminator
Click on this lien for a training video on this treatment (in French). The duration of the video is 12 minutes.
We use the plug-in for Photoshop GradientXterninator to remove the gradient (including removing the vignetting if you have not used a PLU). At the same time, the software performs the color balance of the sky background to make it appear in black tones. See the procedure by clicking on this lien (in English).
Right after removing the gradient, you need to rebalance the image using process # 2 below.
2 - The balance and the color balance of the image (Essential)
Photoshop:
Balance and color balance of the image using levels or the Black and White Point method
Click on this lien for a training video on this treatment (duration 15:59 minutes).
Here is a quick and automatic method to perform an image color balance at the same time as balancing the sky background to a value near 25 and the lightest sections of the image to a value near 245. (0 representing absolute black and 255 representing pure white). This processing is linear, i.e. that it allows to extend the information on the object between 25 and 245. This is the main strength of this processing. It will allow better development (stretching) of the image in the next processing (Use of curves).
This method uses numbers to achieve color balance thus allowing accurate color balance to be achieved. If a monochrome image is used (LRGB technique), this procedure is used to balance the image between the values 25 and 245. Before proceeding, the monochrome image must be converted into an RGB image (Image | Fashion | RGB color).
- Open the image to be processed in Photoshop.
- Open the window Information (Window | Information) (Window | Info)
- Open the window of Layers (Layers)
- Click on the layer that is above all the others
- In the tab of Layers, create a Layers of Levels (Levels) by clicking on the button
 at the bottom of the window and select Levels (Levels). Rename the layer Color Balance or Image Balance (if it is a monochrome image)
 - We are going to put a mark representing the White point (the brightest region of the image) by clicking on the tool Pipette
 , then press the key Shift and click on the brightest part of the image (a star most of the time). A marker bearing the #1 will appear. Make sure that the Size (Sample Size) of the mark is Medium 3 x 3 (top left of the screen). To find the whitest point in the image, use the window Information and move the mouse pointer over the whitest and brightest stars and look in the window Information values RGB. Choose the star that displays the highest values. If the star is small, it may be necessary to perform a Zoom (Ctrl and +) before selecting the star.
 - Do the same process for the Black dot (representing the sky background). The marker will carry the #2
- Double click on the layer Color balance to display the window of Levels
- In the window Levels, double click on the Black pipette which represents the Black dot. The window Target shadow color (Select Target shadow color) is displayed
- Enter the value 25 in the fields Rgb (RGB). These values will balance the sky background so that it appears in black tones.
- Click on OK to accept the entered values and close the window Target shadow color (a window will ask to accept the new default values)
- Double click on the White pipette from the window Levels representing the White point
- Enter the value 245 in the fields RGB and click on OK. This will make it possible to make a white balance of the image thus allowing an accurate color balance, as does a digital camera.
- Click again on the White pipette representing the White point
- Push the button Caps Lock and at the same time click on the marker #1 representing the brightest values in the image. White balance will be performed.
- Click on the Black pipette and perform the same process for the benchmark #2 used to calibrate the sky background in black tones
- In the window Informationn, examine the values of the benchmarks #1 et #2. The values should be close to the entered values. The information presents the value before and after the treatment. For example for the value R (red), if it appears 203/245; the value before processing was 203 and the value after processing is 245
If you have used the treatment 1 - Withdrawal gradient previous, it is recommended to redo the Black and White Point Method to rebalance the image.
3- Using curves (Essential)
The most important processing to perform is the use of curves. If I were forced to take only one treatment, this is the one I would choose. This treatment makes it possible to reveal all the nuances of the object as much in the clearest, middle and darkest luminosities. If the image you took was sufficiently exposed, the image resolution will be maximized with this processing. Be careful not to push the treatment too much to avoid bringing out too much background noise.
This processing eliminates the use of commands Contrast et Brightness that come with most image processing software. It is even strongly recommended that you never use these functions. When trying to resolve the image with the Contrast and Brightness functions, there will be overexposure in the brighter elements of the object such as stars and the sky will become opaque (pure black), which should be avoided.
Photoshop:
Click on this lien for a training video on this treatment (duration 12:48 minutes).
Load the image to be processed in Photoshop. The image has already been balanced with processing no. 2 above (Black points near 25 and White near 245). To get the job done on curves well, it is best to proceed in stages rather than trying to solve everything in one operation. So here is the sequence:
Here is the raw image of M27 that will be processed (the image presented is reduced compared to the original):
1er traitement
In the tab of Layers, create a Layers of Curves (Curves) by clicking on the button at the bottom of the window and select Curves (Curves).
The following window will appear on the right side of the M27 image allowing you to follow the changes that will be made live:
The oblique line which passes in the window will allow the histogram to be modified in a non-linear way (Stretching). This is mainly the strength of this function. We move the slash up to increase the brightness of the object.
Here is the curve modified in the first processing and on the right the resulting image:

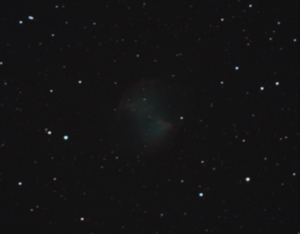
We are starting to see M27 better. The procedure for modifying the curve is as follows:
Output: Make sure that the black sky background has a value close to 25 and for the brightest stars a value close to 245 (0 representing absolute black and 255 representing pure white). As the image was balanced to these values with processing no. 2, click on the curve (from the bottom, the 1er point on the curve above) to give it a value a little higher than 25, say 26 or 27. This will not modify the values below 25. Then click on a value near 245 (the 3e point on the curve above). This will prevent the brightest stars from reaching the maximum value of 255. Then point the mouse to a median value (the 2e point on the curve) and without releasing the right mouse button, move the curve upwards).
We are starting to see M27 better. The procedure for modifying the curve is as follows:
With the same procedure described in the 1st treatment above, I performed 2 other treatments (2 other Curves above the first). For each of these, here is the result on the image of M27:
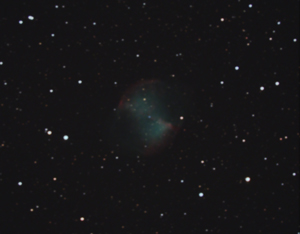
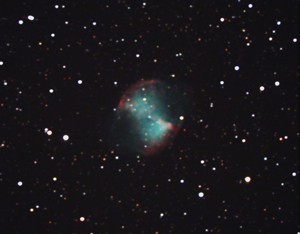
I tried a 4e processing, but this processing did not improve the image because the background noise was starting to be too pronounced. As I mentioned at the beginning, you should not push the treatment too much. Try the curves on your calibrated images according to the procedure described above. With experience you will find, at least I hope, that this treatment is really great.
PixInsight:
CurvesTransform

Using PixInsight's curves is similar to Photoshop's. We can put as many control points as we want.
4- Clone Stamp Tool (Optional)
This quick and easy procedure is used to remove some image defects, such as hot and cold remaining pixels, cosmic rays, color pixels, and all other defects.
Photoshop
- Select Clone stamp tool
- With the right button of the mouse click on the place to correct.
- Modify the size of the circle (1) to be able to completely cover the area to be corrected:

- To put hardness at 50% (2)
- Bang on I to close the window
- By holding down the Alt, with the left mouse button click on the place to copy.
- Release the key Alt and click on the place to correct.
Note: Always choose the location to copy as close as possible to the source to be corrected to ensure that the histogram will be the same or nearly the same.
5- Create a Luminance image from an RGB image (Essential)
If you are using a color CCD camera or a digital camera (digital camera), there is the possibility of greatly improving the processing of images acquired with these devices. The RGB (red, green and blue) color image produced with these cameras is converted into a black and white image called Synthetic Luminance. It is then possible to develop (stretching) the photo even more using the image of Luminance. Indeed, if the color image is developed too much, a lot of grains (background noise) will appear in unsightly colors, which limits the processing. After processing the synthetic Luminance image, it is superimposed on the RGB image. This will give a color image with more detail and depth. This treatment is inspired by the LRVB technique described in this site.
Several improvements have been made to this technique. Due to the greater number of operations to be performed, the processing has been transferred to Create a synthetic luminance image Section Advanced treatments. If a synthetic luminance image is used, the rest of the processing operations will therefore be carried out on the assembled LRGB image.
6- Astronomy Tools: Color Blotch Reduction (Optional)
Often there are colors in the background of the sky. This script will make those colors disappear. We just have to execute it. The process is completely automated.
7- Correct elongated stars using Focus Magic (Optional)
One of the most effective methods of correcting elongated stars is by using software Focus magic. I use it to correct stars that are slightly elongated in one direction. Indeed, there is no point in trying to correct very elongated stars, because you must initially have a good quality image.
The stars may appear elongated following a slight drift during the autoguiding of the mount, a coma problem on the periphery of the image or a slight imbalance of the optical assembly mainly due to the heavy weight of the imaging equipment (camera , filter wheel) which is supported by the telescope focusing system or telescope.
This correction can be applied to the entire image or only to a portion of the image exhibiting slightly elongated stars (for example, a coma problem at the periphery of the image). I will explain here a correction of the stars lying on a part of the image only because it is the most complete situation to present.
It should be noted that Focus Magic is integrated into Photoshop software in the Filter menu. To perform this integration, you just have to follow the instructions that come with the software.
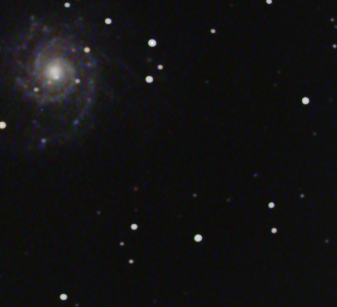
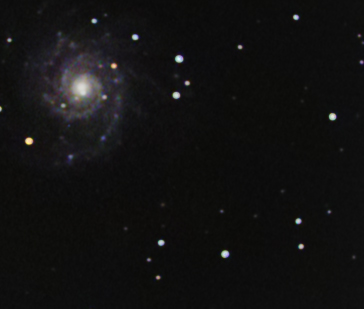
- Open the image with elongated stars in Photoshop. As an example, I will use a luminance image of the galaxy M101 which has a coma problem at the periphery of the image. Here is the portion of the image (top right) with elongated stars:

- With the tool Lasso, select the elongated stars as in the following example:

- Open Focus magic by selecting the menus Filter | Focus Magic
- Configure the correction of elongated stars as in the following example:

- We choose the direction of the elongated stars (Direction Blur) and then we choose the number of pixels (Blur Distance) needed to correct elongated stars, as in the example above. To help us in this task, we look at the image before (Before) and after (After) the correction.
- Click on the button OK to accept the correction.
- As can be seen in the image after the correction, there is introduction of artifacts on the stars and the sky background. To make them disappear, we introduce a Gaussian blur of 0,5 pixel (Filter | Mitigation | Gaussian Blur | Radius 0,5 Pixel)
- Deselect selection by selecting menus Selection | Deselect
- I proceeded in the same way to correct the stars elongated in the other directions at the periphery of the image.
- Here is the full picture of M101 before and after the elongated star corrections:
 |
 |
| M101 - Image before corrections | M101 - Image after corrections |
Of course, you have to click on the images to display them full screen and thus appreciate the corrections made to the stars lying on the periphery of the image.
8- Astronomy Tools: Increase Star Color (Optional)
To increase the color of the stars. We just have to start the script. The process is completely automated.
9- Enhancement of the contrast and nuances of the photographed object (Optional)
Astronomy Tools
Local Contrast Enhancement
To bring out the contrasts and nuances of the deep sky object without increasing the brightness of the stars and darkening the sky background. Always test this script to see if it can improve the image. We just have to start the script. The process is completely automated.
Pixinsight
LocalHistogramEqualization
This treatment offers more controls than the process Local Contrast Enhancement above. It takes a lot more effort to make it happen. So I use it as needed, if I'm not satisfied with the previous treatment (Local Contrast Enhancement).
Here are the default settings for this treatment:

- Kernel Radius : Recommended value between 32 to 128. Lowering the value increases the effect, but creates more noise in the sky background and artifacts on the stars. The default is 64.
- Contrast Limit : A value of 1 does not modify the image. Recommended values between 1,5 to 3. Default value 2.
- Amount : A value of 0,75 means that the resulting image will be a mixture of 0,25 of the original and 0,75 of the processed image. Default value 1.
- Histogram Resolution : Higher values make the calculation more precise, but slower. They can perform poorly on low shades. 8-bit default recommended.
- Circular Kernel : If enabled, the histogram is evaluated from a circular area around each pixel. This is recommended to make the effect more uniform. If disabled, the histogram is evaluated from a square area. It is recommended to enable this setting.
Procedure :
Perform 3 previews:
- Kernel Radius : 128
- Kernel Radius : 64
- Kernel Radius : 32
If there are too many contrasts, modify Contrast Limit et Amount.
This treatment tends to introduce noise into the sky background and artefacts on the stars. So, before carrying out this treatment, see to put on a mask (RangeSelection) to protect the stars and the sky background. See details in Treatment # 16 below.
10- Overexposed image: Using a mask (Optional)
Photoshop
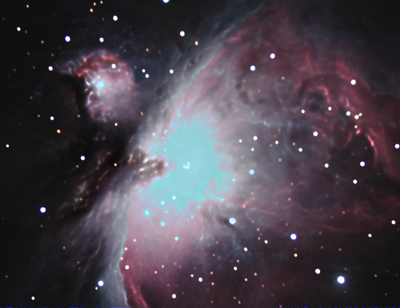
In rare cases, a section of the image is overexposed. When image contrasts are high, take one image series for the darker sections and another series for the lightest sections of the image. Next we use Photoshop to produce a mask of the lighter sections of the image that are correctly exposed. The mask is superimposed on the correctly exposed image of the darker sections.
Here is the long exposure image of M42 (composite of 30 images of 60 seconds):
Here is the short pose (composite of 31 images of 7 seconds):

Production of a mask for the clearest sectional details that will be applied to the final image
- In the toolbar, use Polygonal Lasso Tool to draw a mask of the section representing the lightest section of the image.

Here is the drawing of the mask below. You have to select a mask smaller than the section you want to paste because you will later create a fade that will serve to integrate the mask into the long exposure image without the edges of the mask being visible:

- To select the section that will be used to insert the mask in the final image, we will extend the selection by 40 pixels: Select | Modify | Expand and type 40
- To introduce the fade between the 2 images: Select | Father ... and type 40
- Copy the selection by selecting: Edit | Copy
- Paste on the long exposure image
- Align the mask well on the final image. If you took the short exposure image in another astronomy session (which is often the case), you will need to rotate the short exposure image to perfectly match the long exposure image. To rotate the image use the function Rotate layer below.
Photoshop Rotate layer
- Click on the Layer to be rotated
- Edit | Transform | Rotate
- Move the mouse pointer to one of the four corners of the image
- Press the left mouse button to rotate the layer (Layer)
Opacity
Even if we used a fade between the 2 images, if we notice that the nesting of the short exposure image is too dark and does not merge correctly with the long exposure image, we must use the function Opacity of Photoshop.

In this case I used an Opacity of 80% to better merge the 2 images.
After a few attempts to choose masks and treatments, here is the result before and after the treatment:

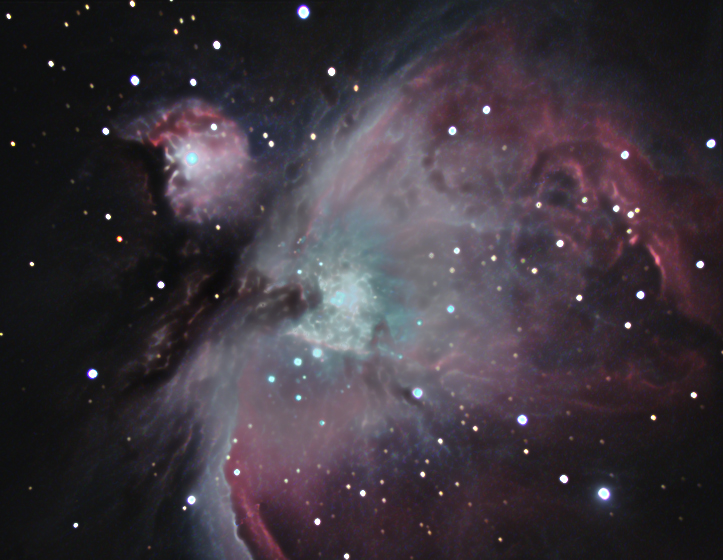
Here is another more recent image of M42 using the same technique described above and made with my current equipment :
Click on the image to display it full screen
11- Astronomy Tools: Deep Space Noise Reduction (Optional)
If there is background noise in the image, run this script. For a more aggressive treatment, we can use the script Space Noise Reduction which will apply noise reduction over the entire image. We just have to start the script. The process is completely automated.
12- Decrease the size of the stars (Optional)
Astronomy Tools: Make Stars Smaller
To make the stars appear smaller. We just have to start the script. The process is completely automated.
PixInsight: Morphological Transformation
This treatment of PixInsight for the reduction of the size of the stars can be more effective than Make Stars Smaller above because it offers more control over this task. I run it as needed.
Here are the default settings for this treatment:

- Operator : By default Erosion (Minimum). Keep this default setting.
- Interlacing : 1. Keep this default setting.
- Iteration : Between 1 and 10. Default 1. Increasing the value will provide stronger star compression. Recommended value 6.
- Amount : A value of 0,75 means that the resulting image will be a mixture of 0,25 of the original and 0,75 of the processed image. Default value 1. Recommended value 0.15. You can also use the value 0.25 for a greater reduction in the size of the stars.
- Size : By default 3 (9 items). Represents the finesse of the treatment. For example, default 3 (9 elements), the structure will be divided into squares of 3 x 3 = 9 squares. The value 5 (25 elements) = 25 squares, so more finesse. Use the default value of 3 (9 items).
- Way : 1 of 1. Keep this default.
procedure:
- Starmask : Used to apply a mask to the stars so as not to modify the deep sky object. You have to do some testing to include all the stars. Here, we do not invert the mask, because we are working on the stars and not on the object. See details of this treatment in point # 16 below.
- Preview : After performing a mask on the stars, select a portion of the image containing only stars with all sizes. Click on the icon with the mouse Preview
 (at the top of the screen) and then select with the mouse a portion of the image containing the stars. Make sure to click on the tab Preview01 to make it active.
 - Morphological Transformation : Change the settings as follows:

- Click on the button Apply

- In the picture Preview01, examine the decrease in the size of the stars by clicking on the icon Undo Preview
 , at the top of the screen a few times. If the treatment is satisfactory, apply this treatment to the image. Click on the tab of your image and then on the button Apply
- For a greater reduction in the size of the stars, change the parameter Amount which is currently at 0.15 and set it to 0.25 and create another Preview (Preview02) to see the new decrease in star size and compare it to Preview01.
- If, despite everything, the deep sky object has been modified following this processing, return to Photoshop and select the deep sky object before this processing and paste it into the image after the decrease in the size of the stars. See the procedure in point # 10 above.
13- Increase image sharpness (Essential)
Air turbulence, wind, humidity, accuracy of tracking or guiding the object are all things that affect the sharpness of the image. It can therefore be considered that an astronomical image can always benefit from an increase in sharpness. You can increase the sharpness over the whole image or only a portion of it. We then use the tool Lasso to select the portion of the image that you want to modify.
Photoshop
Increase sharpness throughout the image
Filter | Reinforcement | Accentuation (Filter | Sharpen | Unsharp Mask)
This processing is less aggressive than Photoshop's Sharpen option and allows more refined control over increasing image sharpness. The settings I often use is Gain (between 50% and 80%), Radius (between 0,5 and 2,5) and Seuil (between 0 and 2). This treatment is available from version CS3 of Photoshop. Before accepting this treatment, zoom in the image and look at the appearance of the stars; avoid adding a black halo around them. If the black halo is too present, decrease the Gain and (or) the Radius and if necessary increase the Seuil.
Here is the explanation of the sharpness control elements:
Radius : It determines the importance of the sharpness halo. A radius of 2 pixels tells Photoshop how many adjacent pixels to consider in its assessment.
Gain : Increasing the percentage increases the sharpening effect.
Seuil : Indicates the number of pixel comparison brightness levels. The increase reduces the sharpening effect while increasing the softness of the Accent Mask. A threshold of 0 emphasizes all pixels in the image. The Threshold is increased when there is a too pronounced increase in the grain (or noise) of the image. The grain will then be reduced.
Immediately after executing the command, select Edition | Mitigate Emphasis (Edit | Fade Unsharp Mask)
Fashion : Brightness
Opacity : 100%
The increase in the sharpness of the image is done only on the image of Luminance (or levels of gray) because it is this which is used to provide all the details on the image. This will avoid adding unsightly grains of color to the image.
Be careful not to add artifacts around the stars (black halos) and the sky background. To avoid it, you have to proceed sparingly.
Increase sharpness on a portion of the image using the Lasso tool
The technique is similar to increasing the sharpness over the entire image. However, we can further increase the Radius to increase the local sharpening effect. For example, for a nebula, increase the sharpness of a portion of the nebula without the sky background, there will be no black halos that will appear in the image, because there is no sky background . Personally, in this situation, I increase the Radius and decrease the Gain until satisfaction. I make sure not to create any artifacts in the image. If necessary, I increase the Seuil to sweeten it all. There are no precise rules on this treatment, it's all about judgment.
14 - Bring out details in the brightest parts of the image (Optional)
One of the very powerful treatments of Pixinsight is the function HDRMultiscaleTransform which allows, among other things, to bring out details in the clearest portions of the image.
Here are the default settings for this treatment:

- Number of Layers : Default 6. Increase the value to work on larger object structures.
- Number of iterations : Default 1. Increasing the value will provide greater compression of the dynamic range.
- Overdrive : Default 0. Value between 0.000 and 1.000. Increasing the value will add an additional percentage to the dynamic range compression.
- Mediam transform : Adds a median value to the dynamic range compression. Helps remove artifacts that may appear in the image after this treatment. So, activate this function if it appears artifacts in the image.
- Scaling function : If we have selected Median transform above, this parameter is not available. Preferably choose B3 Spline (5).
- To lightness : To apply the treatment on the luminance and not on the RGB channels. Activate this function on color images.
- lightness mask : To protect the sky background. Always activate this function.
- Deringing : Use as needed to clear artifacts around stars.
- Libra Midtones : To choose Automatic.
To bring out detail in the lighter portions of the image, change the settings as follows:

Most of the time, these settings will produce very good results in the image. If necessary, adapt this treatment to your image by referring to the explanations of each of the parameters above.
After this treatment, a curve is applied to restore the contrasts of the image, as in the following example:

We can use the curves of Photoshop or those of Pixinsight. For more details, see Treatment # 3 above.
Here is an example of this treatment applied to my image of the Bubble (NGC7635):
Before treatment - Click on the image for a larger view
After treatment - Click on the image for a larger view
By comparing the 2 images, we can appreciate that there are more details and nuances in the lighter portions of the image after using the processing. HDRMultiscaleTransform de Pixinsight according to the parameters explained above.
15 - Adding noise to the sky background (Optional)
Especially in a light pollution environment and after applying the noise suppression treatments mentioned above, the sky background may appear too smooth and without relief, which should be avoided. I then apply this command of Photoshop to add:
Filter | Noise | Adding noise ...
At the field Quantity, enter 2% or 3%.
Before performing this processing, to avoid adding noise to the deep sky object, we can select only the sky background. We surround the object with theLasso Tool and then we click on Selection | Swap.
16 - Use of masks (Optional)
Often, when performing a treatment, we want to apply it to a portion of the image. We then use the mask technique to isolate this portion that we want to treat. There are 3 types of masks:
|
Here are the treatments available in Photoshop:
1- Mask on the stars:
- Astronomy Tools: Select Brighter Stars
- To enlarge the selection, we apply the following Photoshop command:
- Selection | Edit | Expand
- Dilate : 1 pixel for example
- From this moment, we can perform treatments on the stars only.
- To perform processing on the deep sky object without affecting the stars:
- Selection | Invert
2- Mask on the sky background:
We use theMagic wand tool 
- Put there Tolerance between 5 and 10 (see at the top of the screen). Start with 7 and if necessary increase or decrease the tolerance.
- Push the button Shift and click at different part of the sky background to select it all without selecting the deep sky object and stars. Be careful not to select portions of the object.
- Click on Edition | Go back to restart a selection. If necessary, decrease the tolerance to more finely select the sky background.
- If, despite everything, portions of the object are selected, use the tool Lasso to remove these portions. Click on the tool Lasso and press the key Alt and circle the entire object.
3- Mask on the deep sky object
Here is a very simple method to make a mask on the deep sky object. We surround the object with the tool Lasso by putting a Progressive contour (appears at the top of the screen) of 5 pixels or more. The treatments will then be concentrated on the deep sky object without affecting the stars and the sky background that surround it. The smooth contour of 5 pixels or more will better blend the deep sky object with the background of the surrounding sky. Personally, I regularly use this technique to increase the sharpness on portions of the deep sky image.
If you used Pixinsight or other image processing software and you want to paste part of the image before processing with these software, see process # 10 above (Overexposed Image: Using a Mask) for all the details. For example, this procedure makes it possible to paste the deep sky object before processing the image with these other software programs in the image processed by them. It is also possible to do the reverse, paste a portion of the image processed with these software (for example the image of the object) in the image before processing. This treatment can also be used in several other situations.
Here are the treatments available in PixInsight:
1- Mask on the stars:
We use the process Starmask :
- Here are the default settings for this treatment:
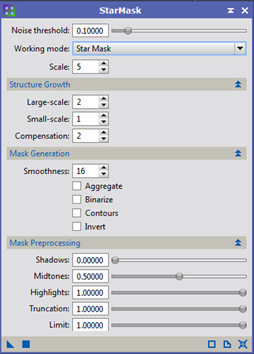
- Noise threshold : Default 0.10000. Decrease the value to include more stars.
- Working mode : StarMask
- Stairs : Default 5. Represents the number of iterations (wavelets) for star detection. Increase the value to include the larger stars if applicable.
- Large scale : Default 2. Increase the value to cover a larger region around the star. ·
- Small scale : Default 1. Increase the value to include smaller stars as needed.
- C : Default 2. Leave this value as default.
- smoothness : Default 16. A lower value can introduce artifacts around the stars. Increasing the value may degrade the protection of the mask. So keep the default.
- Mask Processing : Leave the default values.
procedure:
- To start, use the default values.
- Open the image to be processed.
- Process Explorer | MaskGeneration | Star Mask
- Execute the mask by clicking on the icon Apply

- The mask will appear in preview on the screen. Anything white will be available for processing. Everything that is black is protected:

- Apply the mask in the image by dragging its tab in the tab of the image to be processed. Here is a sample image that will appear on the screen:

- Anything in red will be protected for future treatments.
- If we notice that the biggest stars are in red (therefore protected), we must decrease the default value Noise threshold and increase the default Scales until they appear white. So do some tests starting from the beginning.
- We will now hide the mask (will remain active) to facilitate the visualization of future treatments. With the right mouse button, click on the image and select Mask | ShowMask. To see it again, we perform the same process.
- To perform deep sky image processing without affecting the stars:
- maks | Invert Mask
- To see the mask again after this inversion, with the right mouse button, click on the image and select Mask | ShowMask :

- We see that all the stars are protected (in red). All future treatments will be done without affecting the stars.
2 and 3- Mask on the sky background or deep sky object
We use the process RangeSelection :
- Here are the parameters of this treatment:

- lower limit : Value between 0 and 1. The value 0 has no effect. Use to protect the sky background. You have to increase the value. Click at different place on the sky background to find out the maximum value to exclude.
- upper limit : To exclude the stars. The value 1 has no effect. the maximum value must be lowered. Click on the brightest stars (recommend) to know this limit value.
- Link range limits : Do not activate this parameter
- Fuzziness : This parameter acts as a tolerance or uncertainty factor for the limits of the selection range. Leave the default. If necessary, for a greater tolerance, enter 0.10.
- smoothness : Leave this value at 0.00
- Always checked Lightness.
Procedure :
- This mask operates in the same way as Starmask. So I won't go into all the details.
- If we want to make a mask on the sky background only:
- Suppose the sky background has a maximum value of 0.15. We will register at lower limit 0.0 and at Upper limitt 0.15. Anything between 0.0 and 0.15 (the sky background) will be active for future processing.
- If we want to apply a mask on the deep sky object:
- Suppose the sky background has a maximum value of 0,15 and the brightest stars have a value of 0.95 (i.e. the stars are not saturated). We will register at Lower limit 0,15 and Upper limit 0.90 (a little lower than the value of the brightest stars). Anything between 0.15 and 0.90 (the deep sky object) will be available for further processing. Here, I advise putting a mask on the brightest stars to keep a maximum range for the processing of the deep sky object. This mask will avoid saturating the center of the stars (maximum value of 1.0 reached which represents pure white), which must be avoided. By doing so, we will also avoid saturating the center (nucleus) of the galaxies.
17- Astronomy Tools: Star Diffraction Spikes (Optional)
To add a luminous diffraction cross to the stars. There are several possible scripts: for small, medium or big stars. We just have to start one of the scripts. The process is completely automated.
18- Adjust the resolution of the image to the resolution of the computer screen (Optional)
The final processing I do on my deep sky images is to adjust the resolution of my image to the resolution of most computer screens (including cellphones and tablets). Indeed, this simple technique is an effective way to reduce even more the background noise of the image. Also, I have noticed that several experienced astrophotographers use this technique.
According to an analysis of my website visitors, only 12% of users use a screen resolution above 1920 x 1080 pixels. So the majority of users (88%) use a screen resolution of 1920 x 1080 pixels and below. This resolution is approximately 2 mega pixels (1920 x 1080 = 2073600 pixels). If the resolution of your camera is 16 mega pixels (Mpx), then you can reduce the resolution of your image up to 8 times or to 12,5% (2/16) of the original image. This will reduce the background noise by 8 times! The image will always be displayed full screen (2 Mpx). This will avoid zooming (see note 1 below) unnecessarily in the image to find defects in it that do not appear when looking at the entire image on the screen. Indeed, the interest of the vast majority of those who will look at your image on the Web is to see it full size on the screen, as you present it.
For example, the resolution of my imaging camera is 8 Mpx in 1 × 1 bin and 2 Mpx in 2 × 2 bin. As I produce all my images in 2 × 2 bin, I adjust the resolution of my image in height only, since the width is less than the 1,78 (1920/1080) ratio of computer screens versus the 1,33 ratio (1663/1252) from my imaging camera. The resolution of my height image in 2 × 2 bin is 1 pixels. So I can reduce my image to 252% (85/1080) of the original image. This allows my image to always be displayed in full screen on the majority of computer screens. This technique therefore makes it possible to globally reduce the background noise of my image by 1252% (15-100). In addition, the rare users who will want to zoom in my image to see invisible defects in full screen will not be able to do so anymore!
Another advantage of this process is that it improves the resolution of the image on the computer screen. For example, my 2 × 2 bin imaging camera sampling is 1,73 ″ of arc with the f / 6,3 focal reducer. By reducing the image to 85%, the sampling will increase to 1,47 "arc (1,73 x 85%), which will give an effective image resolution of 2,94" arc to length. 'screen (two pixels are needed to resolve a detail in the image). It is comparable with air turbulence of 2 "to 3,5" arc on most nights. By applying a slight increase in image sharpness (process # 13 above) and / or a decrease in star size (process # 12 above), the sharpness enhancement will be very close to 2 ” arc, which is the ideal resolution in a sky with little turbulence! For more details on imaging camera sampling, click on this lien and go to section Sampling for the deep sky.
Here is the treatment available with Photoshop to change the resolution (or sampling) of the image:
- Menu Image | Image size
- Resampling : Automatic
- Choose display in Pixels in the fields Width: et Height:
- For example if the image in height is 1252 pixels, to reduce the image to 85% of its original value, type 1064 in the field Height: (85% of 1252 = 1064).
- Click on the button OK
The image will be resized to 85% of its original size. The image will always display full screen. It will no longer be possible to zoom in the image. The sampling will change to 1,47 "of arc on screen (85% of the original sampling which is 1,73" of arc). The background noise will be reduced by 15%.
Note 1: Zoom in the picture
In this presentation, the term “zoom” in the image is made with a Web browser (Google Chrome, Microsoft Edge, Microsoft Explorer, Opera browser, etc.). If you display an image on the screen in JPG, GIF or other format and if the image has a higher resolution than the computer screen, all browsers will adjust (decrease) the resolution of the image for the display full screen. For example, if the image has a resolution of 8 MP and the computer screen has a resolution of 2 MP, the browser will resize the image to display it full screen. The image will automatically be reduced to 25% of its original size (2/8 = 25%).
Now, if we click in the displayed image, all browsers will match each pixel in the image to the dimension of a computer pixel. This will have the effect of zooming in the image. We will see only a small portion of the image. In this example, only 25% of the image will be displayed, we will no longer see it in its entirety (full screen).
Richard Beauregard
Sky Astro - CCD
Revised 2021/11/03


