Lovers of the LRGB technique Acquiring deep sky images know the importance of the Luminance image in the resolution of an astronomical image. This is because the RGB color image has a lower Signal / Noise (S / N) level than the Luminance image with a clear filter. This means that the difference between the signal (the resolution of the image) and the background noise is lower, thus limiting the processing to resolve the image. The Luminance image has a higher S / N level thus benefiting from a greater difference between image resolution and background noise. Luminance image processing will provide more detail and depth in image resolution than the RGB image.
The image of Luminance can come from different sources. It can come from a Luminance image taken with a Hydrogen - alpha (HaRGB) filter. You can create the Luminance image from a color layer. One color layer can have a higher S / N ratio than the other two color layers. For example if the object being photographed has a color cast in red, the Red channel will provide more detail on the object than the other two color layers. You can also combine two layers of colors to create the image of Luminance. It is by examining each color layer individually that one will determine the best layer mix to use to create the Synthetic Luminance image that will provide the best S / N ratio, while retaining all the details and nuances of the image. deep sky object.
The treatments that I will describe are mainly intended for those who use a color CCD camera or a digital camera (APN). By using the Synthetic Luminance image, it is possible to further develop (stetch) the deep sky image. Indeed, if we develop too much the RGB color image, due to its lower level of S / N, it will appear a lot of grains (background noise) in unsightly colors, which limits the processing. By further developing the Synthetic Luminance image, it will be possible to reveal more detail on the object and improve the overall resolution of the image while keeping the background noise low, because the Synthetic luminance image at a higher S / N level. After processing the Synthetic Luminance image, it is superimposed on the RGB image. This will give a color image with more detail and depth. The treatments are inspired by the LRGB technique described in this site. To better understand the treatments that will follow, I invite you to read the section on this technique.
We recommend that you use the 16-bit TIF image format (65 possible shades per color channel) to keep as many shades as possible in the processed image. The Luminance image is created from step # 536 of the image processing.
Create a Synthetic Luminance image using one coat or a mixture of coats of color
- Open the RGB image to convert to a Luminance image in Photoshop. It is recommended to use the RGB image processed using the section Image processing of this site. Do not push the processing too far on the RGB image so as not to excessively amplify the background noise on the RGB image. It should be remembered that the RGB image has a lower S / N level than a luminance image, thus limiting the processing to resolve the image.
- Open the window of Layers (Channels) by selecting the menus Windows | Layers (Window | Channels).
- Examine each layer individually by closing the eye icons
 to keep the eye open
  on a single layer of color. You will see that one or two layers offer more detail about the object. If your object is mostly in shades of red, you will find that the Green and Blue channels are very noisy with little detail and therefore unusable to produce a quality Luminance image. If, for example, you notice that the Red and Blue layer offer a lot of details on the object, you must retain these 2 layers to create the Luminance image because the details revealed on the Red layer will be a little different than those revealed on the Blue layer. The reason is that each layer reveals details about the parts of the object representing its color. For nebulae, it is rare that the 3 color layers each offer a lot of detail on the object. Most of the time there will be at least one color layer which will be very noisy with little detail (low S / N).
 - Click on the tab Layers (Layers) on the left of the tab Layers.
- Select (click on it) the layer that is above all the others. If you have only one layer, click on it.
- Merge all previous layers by pressing keys simultaneously Shift+Ctrl+Alt+N+E and rename this layer CUM (for cumulative of previous layers). To rename a layer double click on its name and type in the new name. The layer CUM is therefore above all the others and it is the active layer (click on it to make it active otherwise).
- Click on the icon Create a fill layer
 (at the bottom of the window Layers) and select Diaper mixer (ChannelMixer).
 - Suppose the Red and Green channels are retained to create the image of Luminance. Complete the information as follows:

- The total should always be + 100%. If you choose a single color layer, for example red, you enter + 100% for the red layer and 0% for the other 2. If we choose 2 layers, we write + 50% for each one. In this example we have entered + 50% for the Red and Green layer because it is these 2 color layers that were chosen to produce the Luminance image in the example. So the Blue (0%) channel will not be used to produce the Luminance image. It is noted that the Luminance image will be in shades of gray (black and white) because the Output layer selected is Grey et Monochrome is checked. The Luminance image should always be in shades of gray.
Here are the most frequent treatments I apply to the Luminance image:
- The curves (Curves). Use the curves to reveal all the nuances of the object without increasing the noise too much (see treatment # 3 of the Image processing for more details on the use of curves). I often use, during the last treatment on the curves, a slightly S-shaped curve to increase the contrast of the image.
- Local Contrast Enhancement (Astronomy tools). Most of the time this script reveals beautiful nuances in the object.
- Deep Space Noise Reduction (Astronomy Tools script). Use as needed to remove background noise from the sky (see treatment # 7). If the object that we photographed is noisy (like the object B33 - The Horse's Head Nebula which is a dark nebula), we can use the script instead Space Noise Reduction which will remove noise from the whole image.
Save the image of Luminance by giving it as a name Luminance for example.
Joining the Luminance image with the RGB color image
Click here for a training video (duration 13:27 minutes).
This step will describe the procedure to assemble all Luminance images (with clear filter, H-Alpha or others) including the Synthetic Luminance image, created in the previous step, with the RGB color image.
- Open the RGB image in Photoshop.
- Open the Layers window by selecting Window | Layers (Window | Layers).
- In the tab Layers make the layer that is above all the others active by clicking on it.
- Merge all previous layers by pressing keys simultaneously Shift+Ctrl+Alt+N+E and rename this layer RGB which represents the image RGB. To rename a layer double click on its name and type in the new name. The layer RGB is therefore above all the others and it is the active layer (click on it to make it active otherwise).
- Open image of Luminance in Photoshop.
- The image of Luminance being active, we will Copy paste Luminance image in RGB image. Selection | Select all (Select | All) and then Edition | To copy (Edit|Copy).
- Click on the picture RGB to make it active.
- Edition | To stick on (Edit | Paste). In the tab Layers, the Luminance image appears above the layer RGB and bears the name of Layer 1. Rename it Layer 1 for Luminance.
- Click on the drop-down menu Fusion mode and select Brightness (Luminosity). .
 Leave the field Opacity 100%. The Luminance image is now stitched with the image RGB. The image that we see on the screen is now in color. But the color saturation decreased after stitching it to the luminance image.
 - We are therefore going to increase the color saturation of the image. Click on the layer RGB to make it active.
- Click on the icon Create a fill layer (at the bottom of the window Layers) and select Hue / Saturation (Hue/Saturation).
- Enter the value 40 as a starting point in the bar Saturation. The value of Color saturation to be entered varies according to the color saturation of the image RGB. A value between 20 and 70 gives good results most of the time. Look at the result in the picture LRGB (by clicking on the layer Luminance). By increasing the color saturation, we also increased the background noise on the colors of the image. It should be remembered that an RGB image has a low level of S / N. We are therefore going to add a blur to the color image to remove these unsightly grains of color that appear on the image. LRGB.
- Rename the layer Hue / Saturation 1 for Hue / Saturation 40 to remember that we increased the color saturation by a value of 40.
- Render the layer Luminance inactive by closing the icon Eye
- Make sure the layer Hue / Saturation 40 is active by clicking on it.
- Simultaneously press the keys Shift+Ctrl+Alt+N+E. Rename the created layer CUM for Cumulative of all previous layers.
- The CUM layer is therefore below the Luminance layer. Make the Luminance layer active by reactivating the icon Eye and make sure that the layer CUM is active by clicking on it.
- Select Filter | Mitigation | Gaussian blur (Filter | Blur | Gaussian Blur) and enter 1 pixels in the field Radius (Radius). If there is background noise in the image, increase the Radius from 1 pixel to the faith until the disappearance of the background noise. Most of the time, a value between 3 and 10 pixels is enough to make it disappear. With this technique, we can also remove other defects in the RGB image such as unsightly halos of colors around the stars.
- Suppose the value of Radius seized is 5 pixels. Rename the layer CUM for CUM; FG 5 pixels to remember that we added a 5 pixel Gaussian blur.
- If the LRGB image is not satisfactory (it remains too noisy or the color saturation is not to your satisfaction), repeat processes 10 to 19 until you are satisfied.
- Finally, it is often interesting to create a slight S-curve to increase the contrast of the image. LRGB. Click on the icon Create a fill layer (at the bottom of the window Layers) and select Curves. Use the following example to create the curve:

Be careful to keep the sky background values between 25 and 30 and the values of the brightest stars close to 245 (0 being pure black and 255 being pure white, which should be avoided).
In summary and in comparison with the LRGB technique, here are the treatments we have done to produce an LRGB image using a Synthetic Luminance image:
- To create a quality Synthetic Luminance image, we used one or two color layers of the RGB image in order to have the best possible S / N ratio for the Luminance image and thus get closer to a Luminance image taken with a monochrome camera without a color filter.
- It is the Luminance image which presents all the details of the image, the RGB image is only for adding the colors to the image, it does not have to be as resolute and sharp as the image. image of Luminance.
Finally, here are two examples of images made using a Synthetic Luminance image.
 |
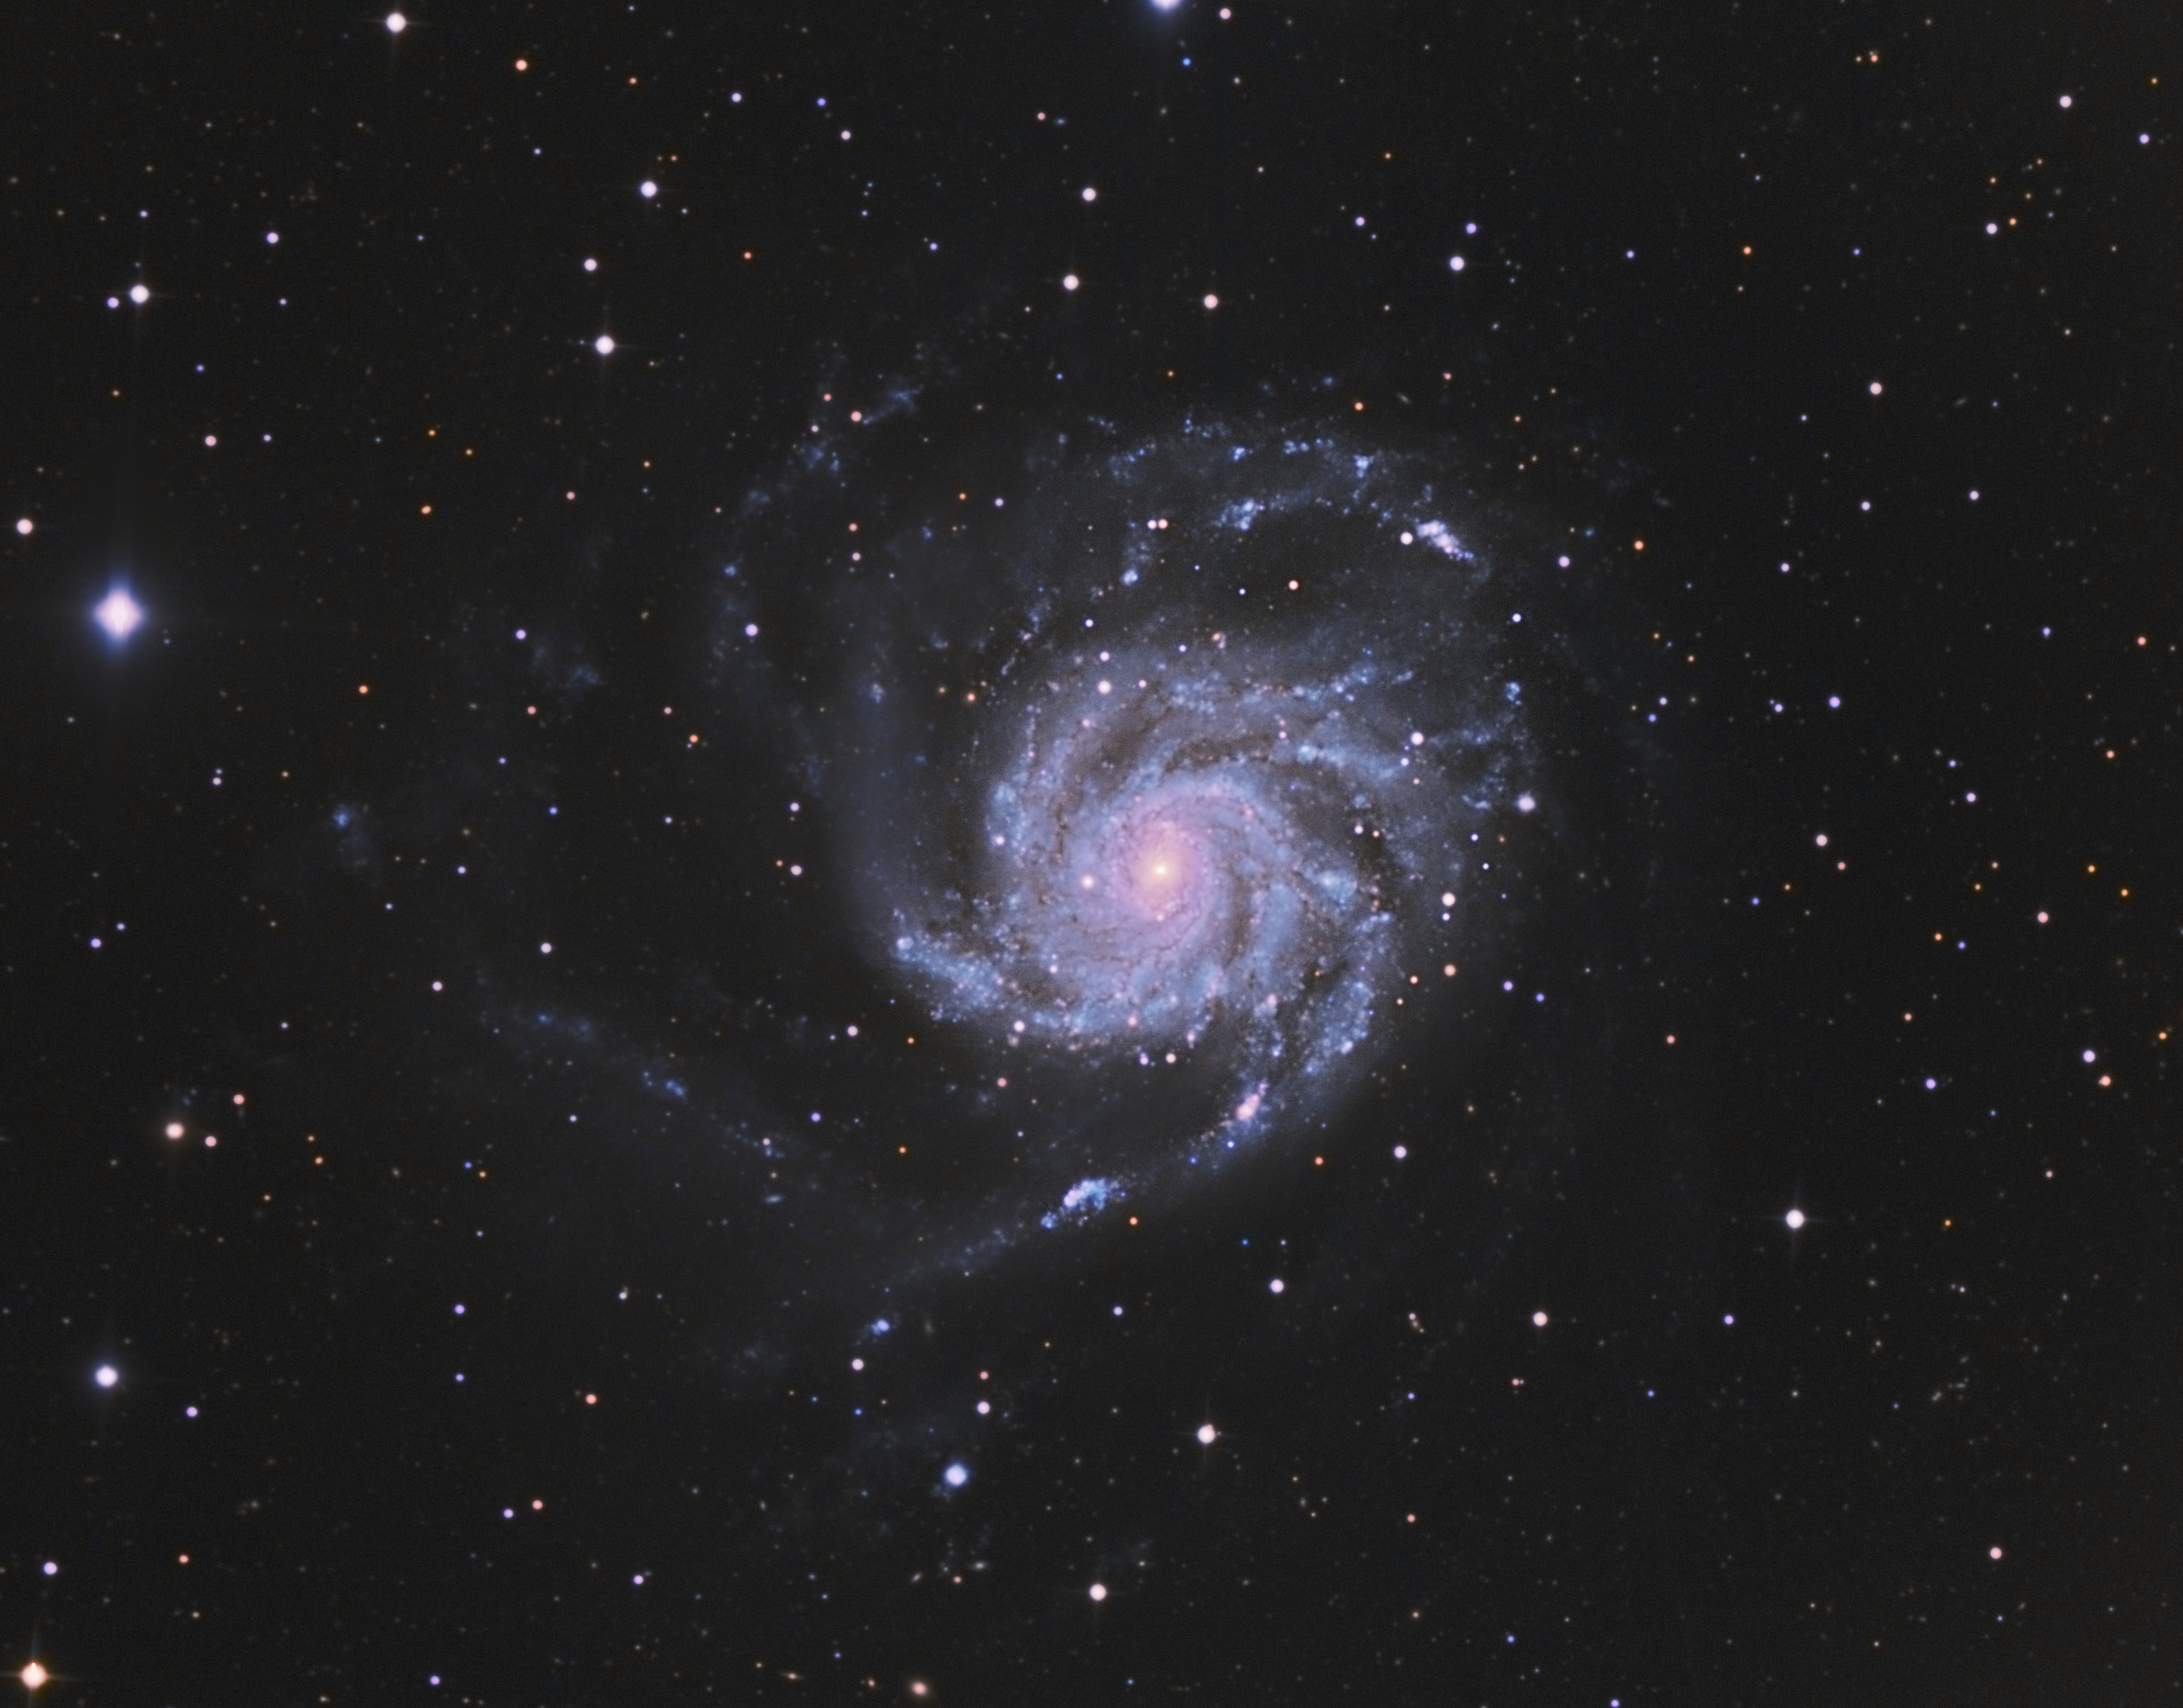 |
| M101 - RGB image | M101 - Ls image (RGB) |
 |
 |
| B33 - RGB image | B33 - Ls image (RGB) |
The images on the left show the best processed RGB images before too much background noise appears. The images on the right show the LRGB images produced using a Synthetic Luminance image. The differences are really impressive.
Here's a more recent image using the same technique:
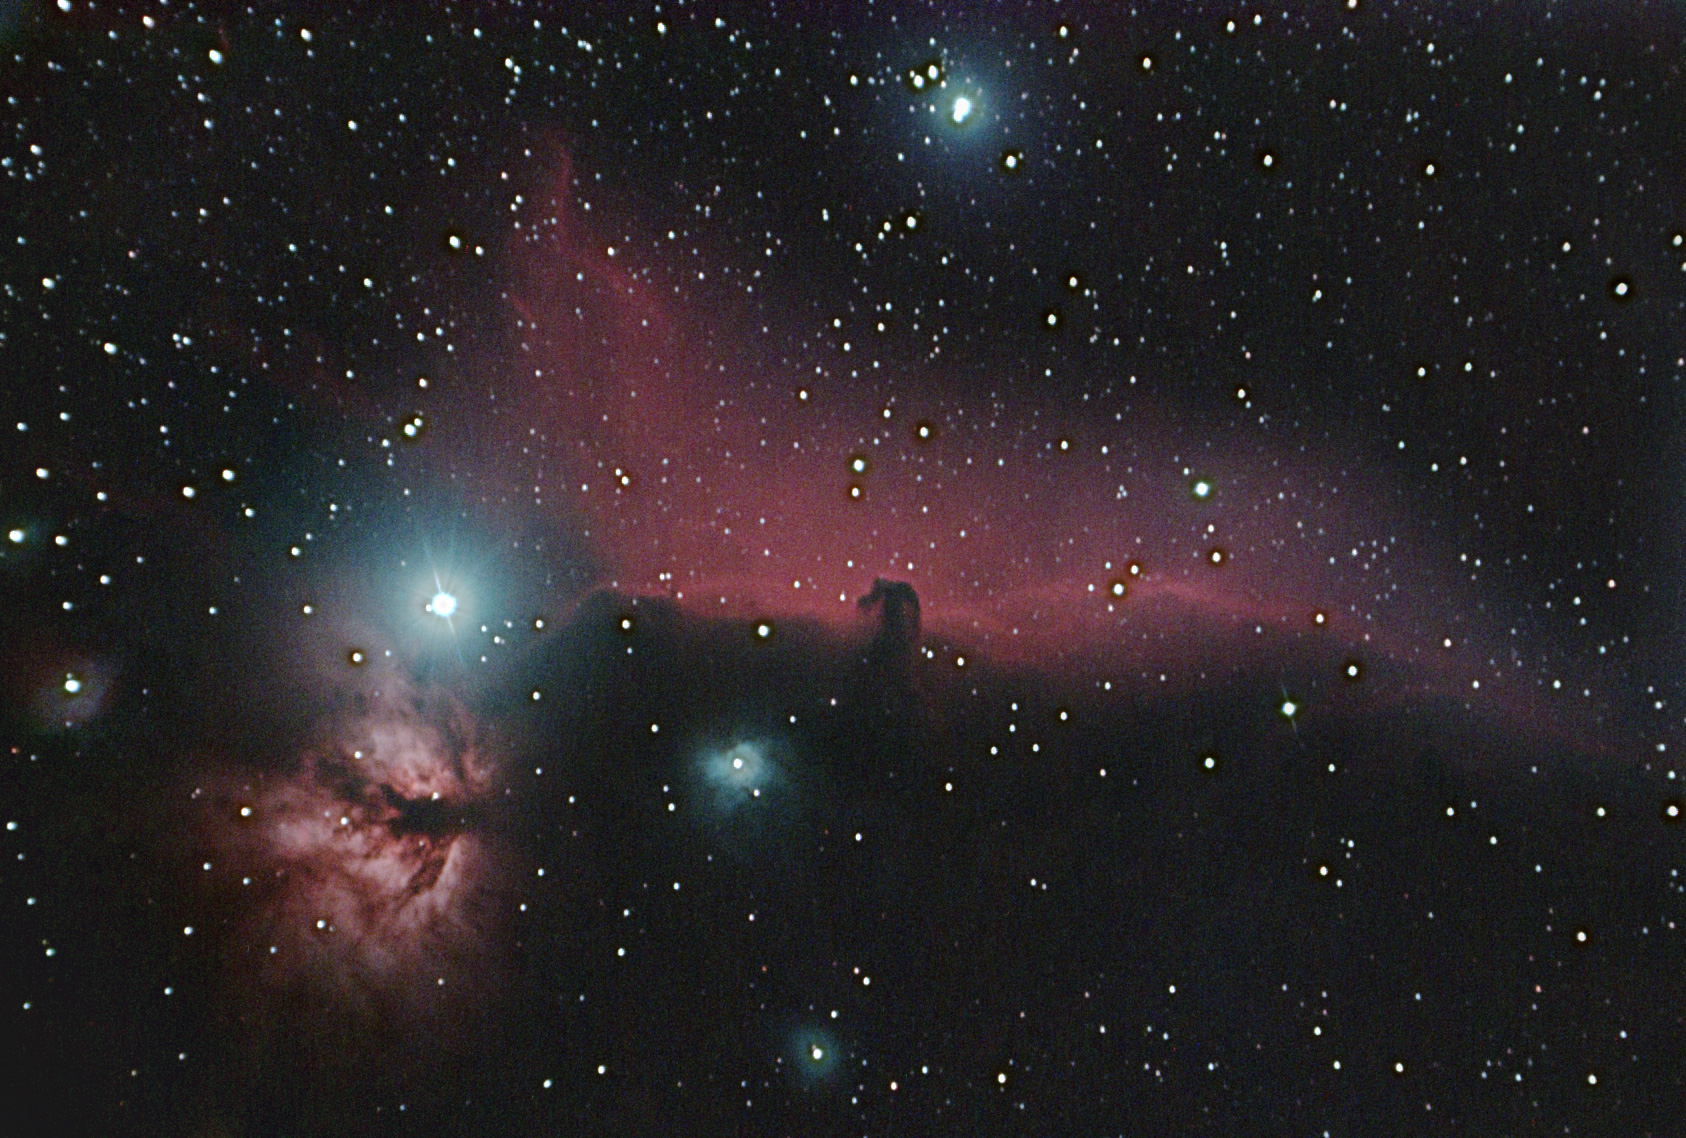 |  |
| IC434 - RGB image | IC434 - Ls image (RGB) Click on picture to enlarge |
The image was produced with a color camera and the IDAS LPS v4 (Narrow Band for Nebula) filter. Create a synthetic luminance image using the red channel. The image therefore becomes:
HAs (Ha-OIII-H_Beta)
HAs: Synthetic luminance in Ha using the red layer.
Richard Beauregard
Sky Astro - CCD
Revised 2021/02/28